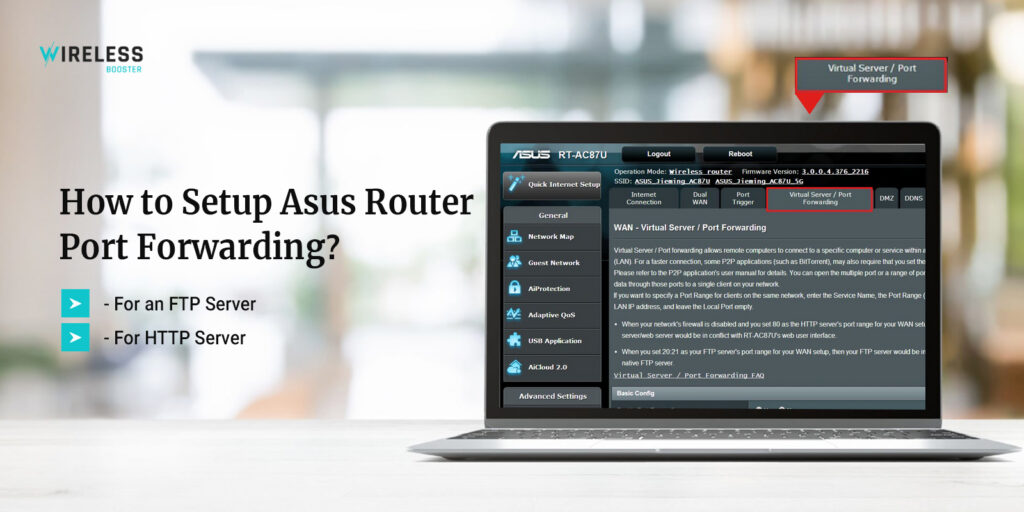
How to Setup Asus Router Port Forwarding?
The Asus router is among the top gaming routers of all time. You can expect a high-speed internet connection along with various incredible features. This router also offers the Asus router port forwarding feature that can be helpful. As a beginner, understanding port forwarding can be difficult. But you don’t have to worry, as we are here for you.
When you know the proper procedure to set up port forward on Asus router, you can do it easily. As the Asus router is a gaming router, it’s a must for it to have port forwarding. If your game or application requires port forwarding, then you must know the proper steps to enable it.
If you require assistance with port forwarding Asus router, we’ve got you. We have made this post to help users with the port forward procedure. You can find the complete process for the port forwarding. We will also go over the issues you could face along with the troubleshooting methods.
Necessities for Port Forward Asus Router
To port forward the Asus router, there are some things you must have. With these things, you can set the port easily. You require the following things:
- Access to the web interface
- Local IP address of the device
- Number of ports to forward
- TCP or UDP
These are some things you must have for the Asus router port forwarding. Now, we will go over the steps to enable port forwarding.
Steps to Port Forward on Asus Router
You can set up port forwarding Asus router after logging into the web interface. Through the web interface, you can customize the port forwarding settings properly. To log into the web interface, you require the default IP address and login credentials. We will explain the procedure to set up a port for both FTP and HTTP servers. The steps to enable port forward Asus router are as follows:
Port Forwarding For an FTP Server
- Firstly, connect to the router and open a web browser of your choice.
- Now, enter the IP address in the address bar to access the login page of the router.
- On the login page, enter the login username and password in the given fields.
- The web interface of the router will appear on your device’s screen.
- Hereon, you need to go to the Advanced Settings, and to the WAN page.
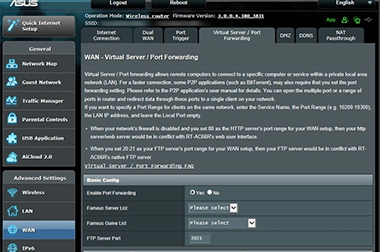
- Then, access the Port Forwarding section to set up port forwarding.
- Under Basic Config, select FTP and then enter a port range and tap the local IP.
- After that, click Edit and then Apply and the FTP server will run on the router
- Finally, you can configure the settings and then check if the FTP server is running or not.
Port Forward For HTTP Server
- To begin with, log into the web interface and access the Port Forwarding settings.
- Now, under Basic Config, select the HTTP server from the famous server list.
- Hereon, you need to enter a port range for the HTTP server and select the local IP.
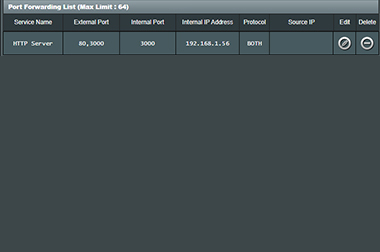
- After that, click Edit and then Apply and HTTP server will start running.
- At last, save the changes you made and then check if the HTTP server is running.
These are the steps for port forwarding on Asus router. The ports are successfully set up for the Asus router. If you want to know how to check if the ports are working or not, we will explain further.
How to Check if the Asus Router Port Forward is Running?
You can check if the port forwarding is running easily. To check this for both servers, follow the steps below:
Checking Port Forward for FTP Server
- Initially, you must have a PC outside of your LAN with a proper internet connection.
- Ensure this PC is not connected to the Asus router in any way.
- Hereon, you can use the WAN IP to access the FTP server using an FTP application.
- If the FTP server is working, you should be able to access the FTP files.
- Lastly, if the FTP server isn’t working, you can try setting them up from scratch.
Checking Port Forward for HTTP Server
- Primarily, try to access the HTTP server with a PC outside of your LAN.
- Ensure the other PC has a stable internet connection to try this out.
- Hereon, on the other PC, open a web browser and enter the router’s WAN IP address.
- You need to enter the IP address in the address bar of the web browser.
- If the HTTP server is correctly set up, you should be able to access the web page.
- Subsequently, this web page is provided by the HTTP server.
These are the steps to check if the port forward is correctly set up on your Asus router. Further, we will go over the methods you can use to fix the Asus Router Port Forwarding Not Working issue.
How to Fix Asus Router Wireless Port Forwarding Not Working?
Several reasons are responsible for the port forwarding not working. You must fix the issues within the router to set up port forwarding accurately. To eliminate the port forwarding issues are as follows:
Turn Off UPnP
- The UPnP feature also causes issues with the router’s port forwarding.
- To turn off the UPnP feature, you need to log into the router’s web interface.
- Now, go to the Advanced settings, and then to the Port forwarding settings.
- Here, you can disable the UPnP feature and then try again with the port forward.
- This should fix the Asus router port forwarding not working issues.
Disable VPN/Firewall
- The VPN or any firewall enabled on your router also causes the issues.
- Thus, for the port forwarding to work properly, you must disable VPN.
- Just log into the web interface, go to settings and turn off the VPN or firewall.
- Hereon, try setting up the port forwarding once more from the web interface.
Update the Firmware
- Sometimes, due to outdated firmware, you face issues with the router.
- Thus, you must update the firmware of the router whenever it’s available.
- You can update the firmware by logging into the web interface.
- Afterward, try setting up the port forwarding once more.
- Now, the Asus wireless router port forwarding issue should be gone.
Reset the Router
- If none of these methods are working, you must reset the router.
- The reset will fix all glitches and bugs within the router.
- To reset the router, locate the reset button on the router.
- Now, press the reset button and hold it for some time.
- After that, release the reset button after 5-10 seconds.
- The reset is successful and all factory default settings are back.
These are the methods you can use to fix Asus router port forwarding not working issue. Now, the port forward should be working properly. We hope you understood the procedure to enable port forward on your Asus router. If there’s any issue you face with your router, you can get in touch with us right now for a solution.