How to Setup Loom WiFi Extender?
Nowadays, a speedy and secure network is the demand of the modern era. Likewise, if you face difficulties with your router network, then you can opt for the Loom WiFi extender. It will help to boost the range of the network and eliminate dead zones in your living space. Similarly, if you buy a new Loom range booster, then you must understand the Loom WiFi extender setup.
In addition, configuring a range booster is but you need to access the admin panel first. After that, you can set it as per your needs and make the most of your extender. Likewise, you can perform the Loom WiFi extender signal booster setup through two methods, i.e. using an IP address or through the WPS button. In this blog post, we will explain both methods and also the troubleshooting steps to fix the errors that arise during the process.
Necessities for Loom Extender Setup
Additionally, before you begin with the configuration process for your range extender, then must know the things that you require during this operation. Here, we list them below:

Loom WiFi Extender

Network Connection

IP Address

Admin Details

Ethernet Cable

Computer/Laptop
How to Execute Loom WiFi Extender Signal Booster Setup?
Moreover, setting up the Loom range extender is quite easy if you know the methods. Likewise, if you don’t know, then stay tuned to this section. Here, we explore the complete methods to perform the setup. Additionally, all you need to begin the procedure is an accurate web or IP address and Loom Extender Login credentials. Similarly, connect the Ethernet cable with care and ensure sufficient power supply to the extender.
Setup Using the WPS Button
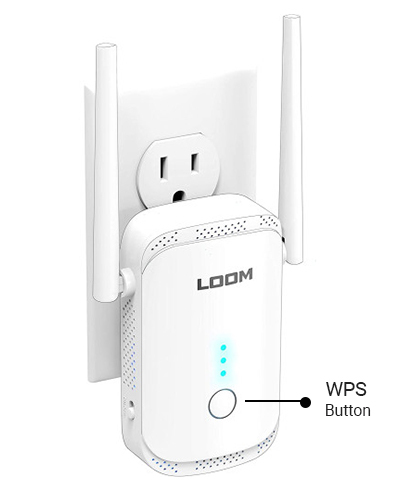
- First and foremost, ensure that your extender is powered on.
- Next, locate the WPS button on your loom range extender and router.
- You can also use WPS from the Settings page of your present router if it does not have a WPS button.
- Further, push the WPS button on your router and extender together for 2 seconds and then release.
- Now, check the router connection LED, and the range booster signal light will be flashing or glowing.
- Additionally, the range extender devices will connect to 2.4GHz and 5GHz band networks if the WPS buttons on both your router and extender are simultaneously pushed.
- Lately, the range extender has now successfully linked to your router’s network.
Setup Via Web Browser
- Initially, ensure that your range extender is connected to the power source and is turned on.
- Now, link the extender network to the computer/laptop.
- You can use a wireless connection or connect the Ethernet cable for a wired connection.
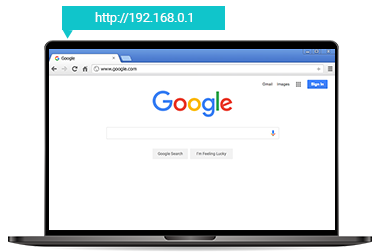
- After that, open the web browser and type 192.168.0.1 IP address or www.loom.com web address.
- Here, a login window displays to you.
- Next, enter the admin details on the login window and tap on Login.
- Further, you visit the smart setup wizard here and visit ahead to Settings.
- Now, you are shown a list of the available networks.
- Afterward, select your Home network here and enter the password for it.
- Next, you are prompted a message on the screen that “you get disconnected from the Loom network and connected with your Home network.”
- Now, your Loom network creates its own SSID name as _EXT.
- Here, choose the bandwidth according to the devices you use and the area.
- Next, you can enable the Guest mode, Port forwarding, and more.
- Finally, your extender gets configured, and then click on Save to apply the settings to use it freely.
How to Login to Loom WiFi Extender?
The web interface of the Loom extender is simple and anyone can easily access it. Likewise, the web address is an easy method to enter into the admin panel of the range booster. If you buy a new Loom range gateway then no need to worry, we will explore the steps here to log in to Loom WiFi extender. Let’s have a look:
- Before all else, ensure the sufficient power supply to your range extender and turn it on.
- After that, link the extender network to the computer or Laptop that you have.
- Next, launch the web browser and type 192.168.0.1 IP address or www.loom.com web address in the URL bar of the browser.
- Further, a login window shows you with admin detail blanks.
- Hereon, enter the username and password for your range extender.
- After logging in, you see a list of available networks and select your Home network.
- Now, go to the WiFi settings and change the SSID name and password here.
- It is necessary to change to secure your network from hacking and other cyber threats.
Finally, apply the setting and tap on Save or Apply. Your extender is now ready to use.
How to Troubleshoot Loom Extender Setup Issues?
Consequently, having issues with the setup process are common if you are not aware of the configuration process or sometimes other scenarios are also responsible for it. Likewise, errors may occur due to incorrect details, unstable network connections, faulty cables, etc.
On the other hand, these issues are very common and temporary, so, it is necessary to resolve these issues for the optimal functioning of the range booster. So, let’s take a glance at the solutions to fix the setup errors.
- To begin with, check whether the internet is stable or not. If not, use a wired connection using an Ethernet cable.
- Next, examine the networking cable you use as cables are not defective and connections are tight.
- Additionally, use the accurate admin details for the Loom extender login.
- Make sure that your extender has an adequate power supply.
- Check and eliminate the web browser issues.
- Disable the security software like VPN, Firewall, antivirus, etc.
- Ensure you are using the correct IP address to open the admin page.
- Reboot your router and extender as well, if you face any technical glitches.
Final Thoughts
All things considered, the information we share regarding the Loom wifi extender setup will surely assist you in executing the process effortlessly. Additionally, you can opt for a WPS method or use a web address method to configure your range extender according to your requirements. Similarly, if you are not aware of the Loom extender login, then must check our log-in section steps. Besides this, if you get stuck with the procedure, then walk through the troubleshooting methods we explain above. Still, seeking help? Approach us here!